
I’m pretty new to quilting. I made this quilt (my first quilt) over a year ago, and only sort-of knew what I was doing. However, since I’ve not seen another how-to for a quilt like this, I think it’s worth posting.
What you will need for a baby quilt size:
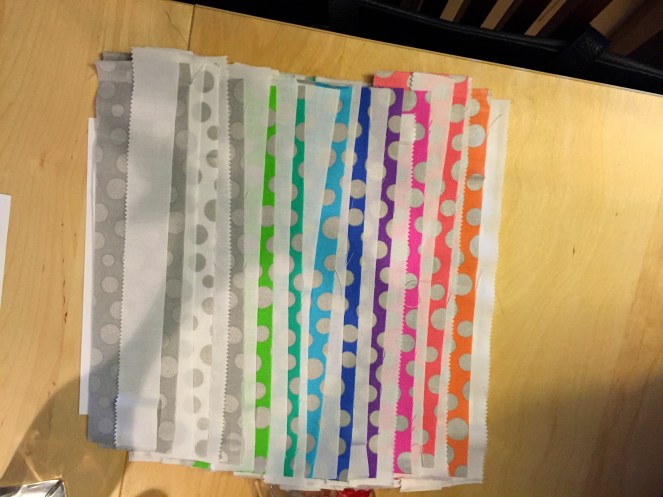
1 jelly roll of patterned fabric (I started with a jelly roll of the polka dot material)
1 jelly roll of just plain white (I used Moda)
Binding fabric — about half a yard(?) (I used Kona pewter grey)
2 1/2 yards of backing fabric (I used a white-on-white chevron print)
Baby quilt batting (I used Warm and Natural baby — 45″ x 60″)
General knowledge of how to quilt (hopefully you are better at this than I am!)
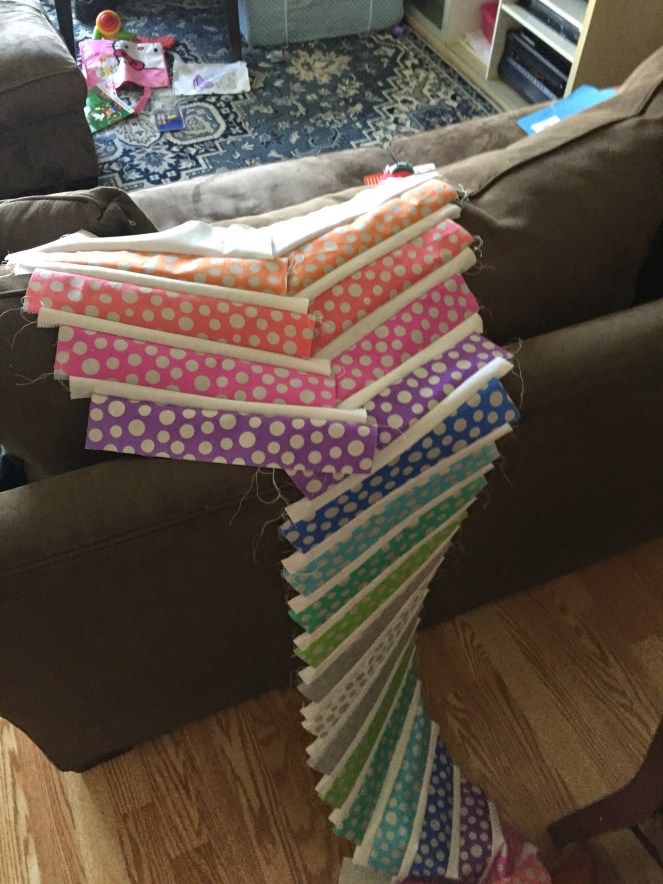
The first thing I did was cut the pre-cut strips into 4 equal lengths, so 11 inches each for 44-in wide strip. In thinking about this further, I’d recommend just cutting the strips in half, so 22-inches long each. I then cut some of the white fabric pre-cuts in half horizontally, so that they would be 1.25″ wide instead of 2.5″ wide, and then cut them into 11-in lengths, like the other strips (again, better to cut then in half to be 22-inches long). Just make sure the strips are the same length. I cut enough to go in between each bit of the patterned fabric.
Next, I sewed them, alternating patterned piece with white piece, and offset each row by about 1″. I’m sure there is a really precise way of doing this and I’ll leave it to more experiences quilters to figure it out, but that’s what I did.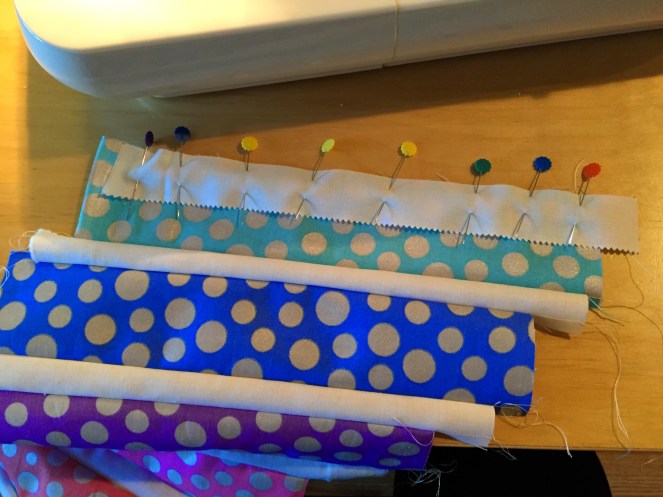
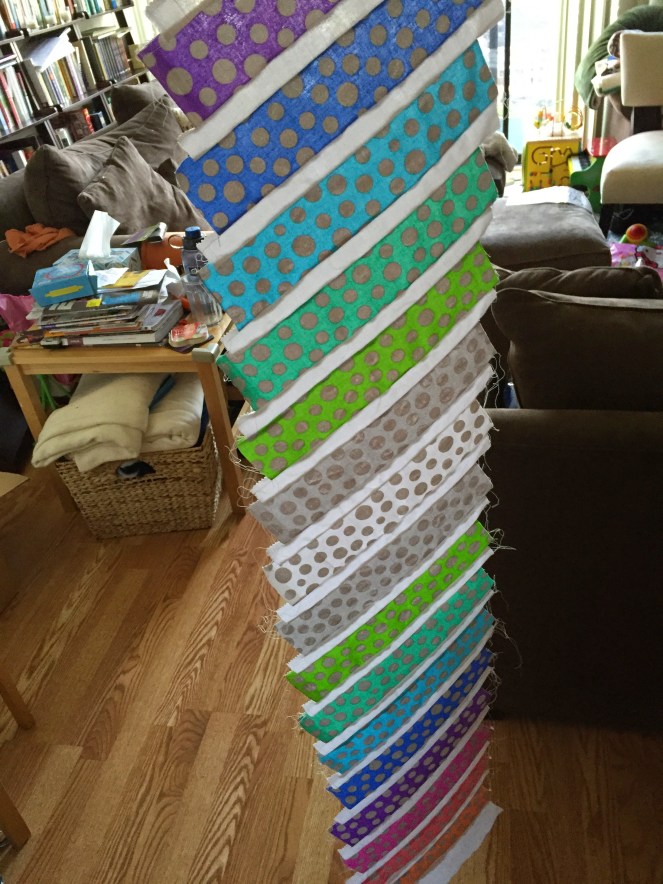
Continue on until you have the length you want. For this quilt, I made it the total length of the batting I purchased. (I used Warm and Natural 45″ x 60″.)
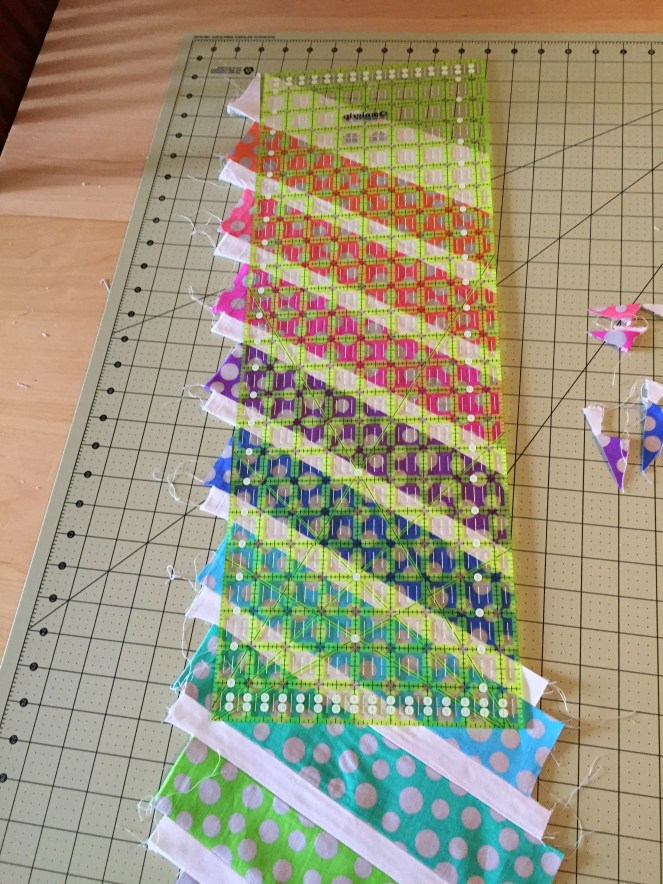
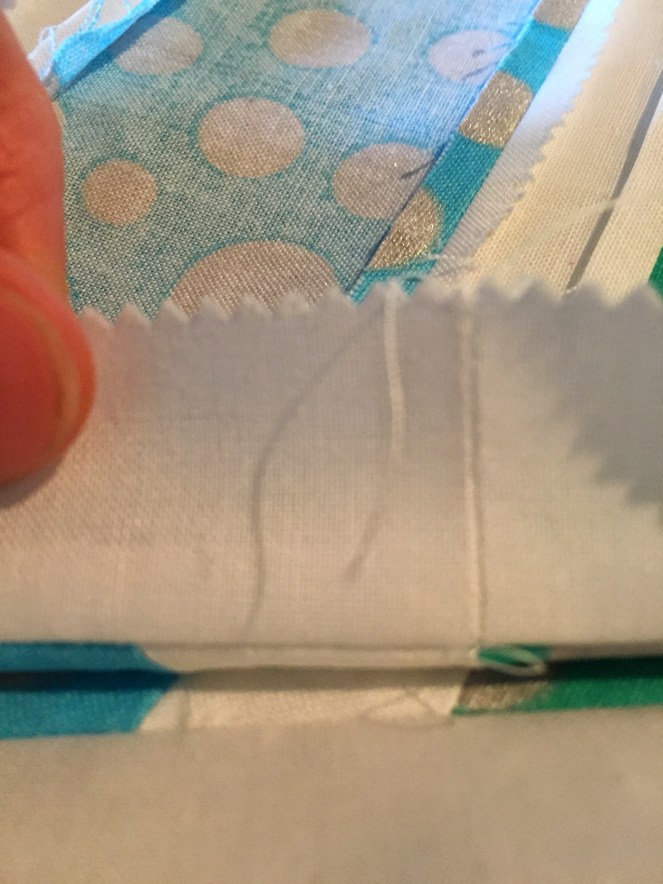
Important: To get the chevron effect, you have to sew each length differently — meaning, you have to sew one side with the white fabric overlapping the patterned fabric by 1″ pointing upwards, then the other side with the patterned fabric overlapping the white by 1″ pointing downward. It’s a little hard to explain, so let me show you…
It’s good to do a reality check as you are going along, to make sure you are making the pattern. Again, I made it harder on myself by doing the 4 sets instead of 2 sets and then cutting, but it’s just one of those things you figure out as you sew more.
I added a full 2 1/2″ white strip to the bottom and top of each. I then trimmed the sides so that each of the 4 lengths measured 9″ across. (Here is where you would cut the 2 sets in half lengthwise if you were making 2 lengths instead of the 4 that I made.) I tried to cut it at a specific angle, but it didn’t quite work for some reason I don’t know.
After I sewed all four lengths, and trimmed the sides, I added a 1.25″ strip down one side of each:
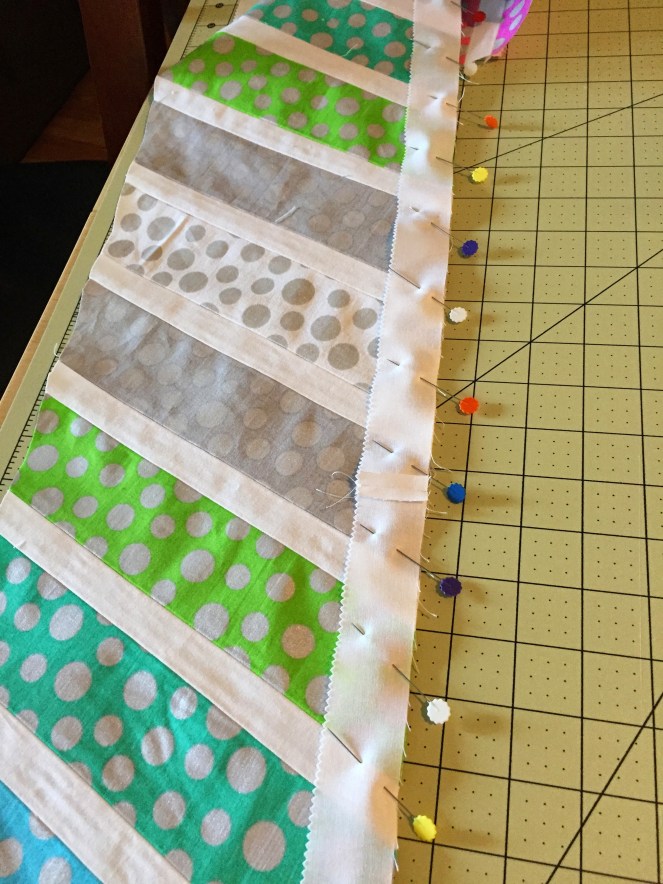
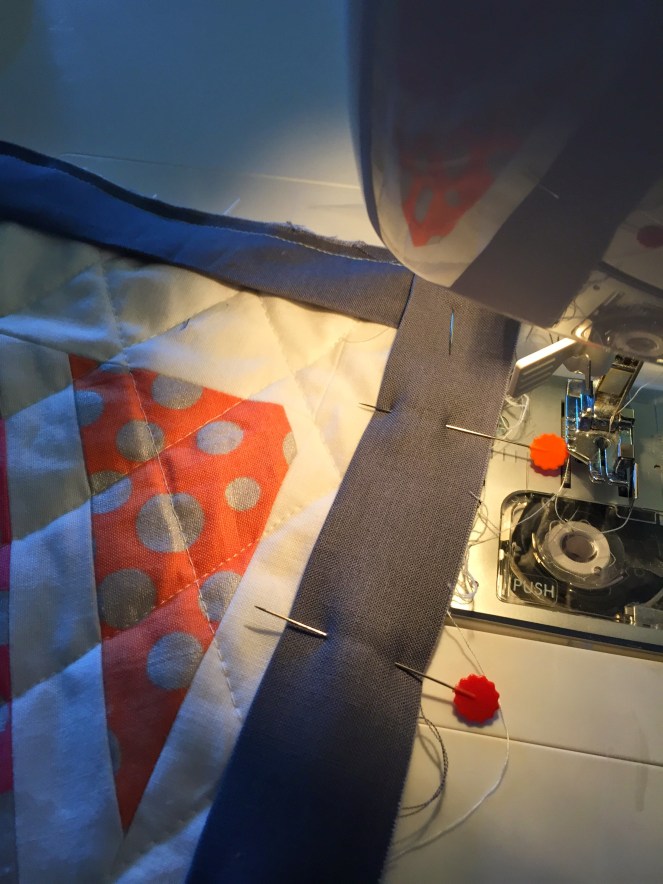
Then I tried to sew the rows together…
Oops! Not matching up. Again, precision would have been great here!
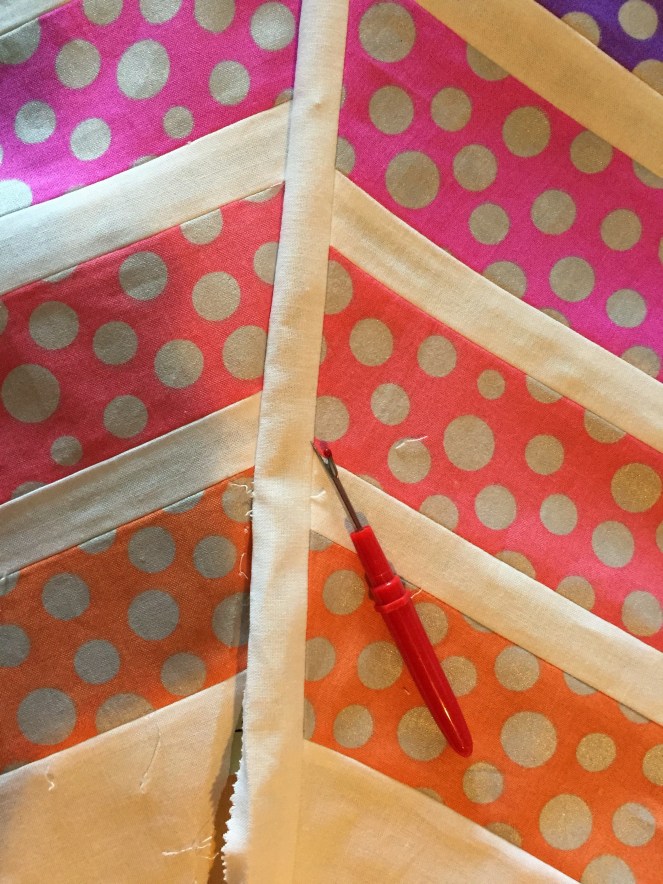
So I came up with the solution of adding another 1.25″ strip (so there was one to the right and one to left of each of the 4 lengths.
I was able to better line up each length. That also helped hide the fact that one of the sets was WAY off. But oh well— I didn’t feel like redoing it at that point! If you look closely at the finished picture, you can totally tell. Did I mention this is my first quilt?
I then trimmed up the bottom and added one more strip of white (full 2 1/2″) across the top and bottom.


Next I made the quilt sandwich quilted with diagonal rows. Now that I have more experience, I know to draw the lines on there with a ruler and disappearing ink or chalk first, but for this one I just did it freehand, using the design itself to guide me.


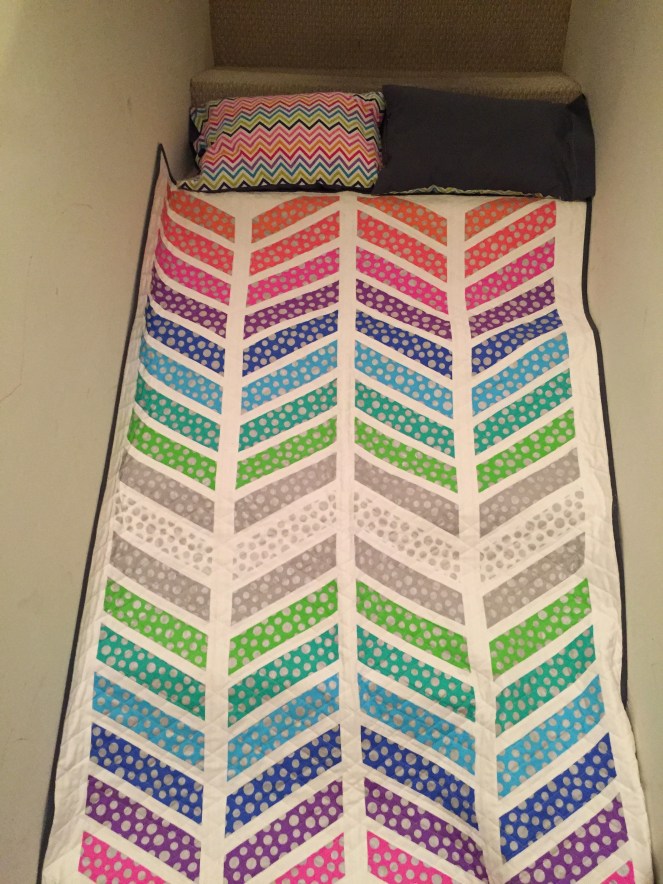
Not perfect quilting by far, but I’m OK with that. Next, I bound it in the dark grey.
I then made some tiny pillow cases in coordinating fabrics.
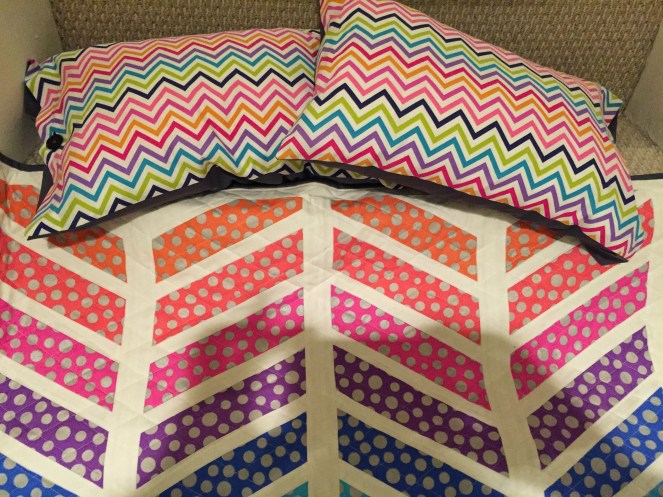
Voila!
